Monday 8 May 2017

Nikon FA - Setup for Leica lens & Others


How to setup a Nikon FA to read another manufacturer lens and then operate okay in P & S mode.


The FA is a sophisticated camera with Manual, Aperture Priority, Shutter Priority and full Program modes. But with the Leica lens, older Nikkors, or other lenses like SP Tamrons, they will only work on M or A mode. They will also only work on Centre Weighted metering not the AMP (Automatic Multi-Pattern). 

Studying the Mir.com.my site I could see the possibility that the lens Meter Coupling Lever would give the info to the camera as to the type of lens fitted and this should then make the S & P modes work, as well as the AMP metering. I experimented with small plastic packers and sure enough the camera registered this info as if a Nikon AIS lens was fitted. I then fabricated a small plastic block from 2.3mm thick plastic and this locks securely under the Meter Coupling Lever and provides a stopper at the correct distance. As a very rough guide here are the stopper sizes needed to register the Maximum Aperture Index of varying lens maximum apertures.

1.5mm = F1.2, 1.8mm = F1.4, 2.4mm = F1.8, 3.2mm = F2, 3.4mm = F2.5, 4.3mm = F2.8, 5.5mm = F3.5, 6.5mm = F4.5, 7.3mm = F5.6. These are just approximate and you will need to test & file carefully to get it right.


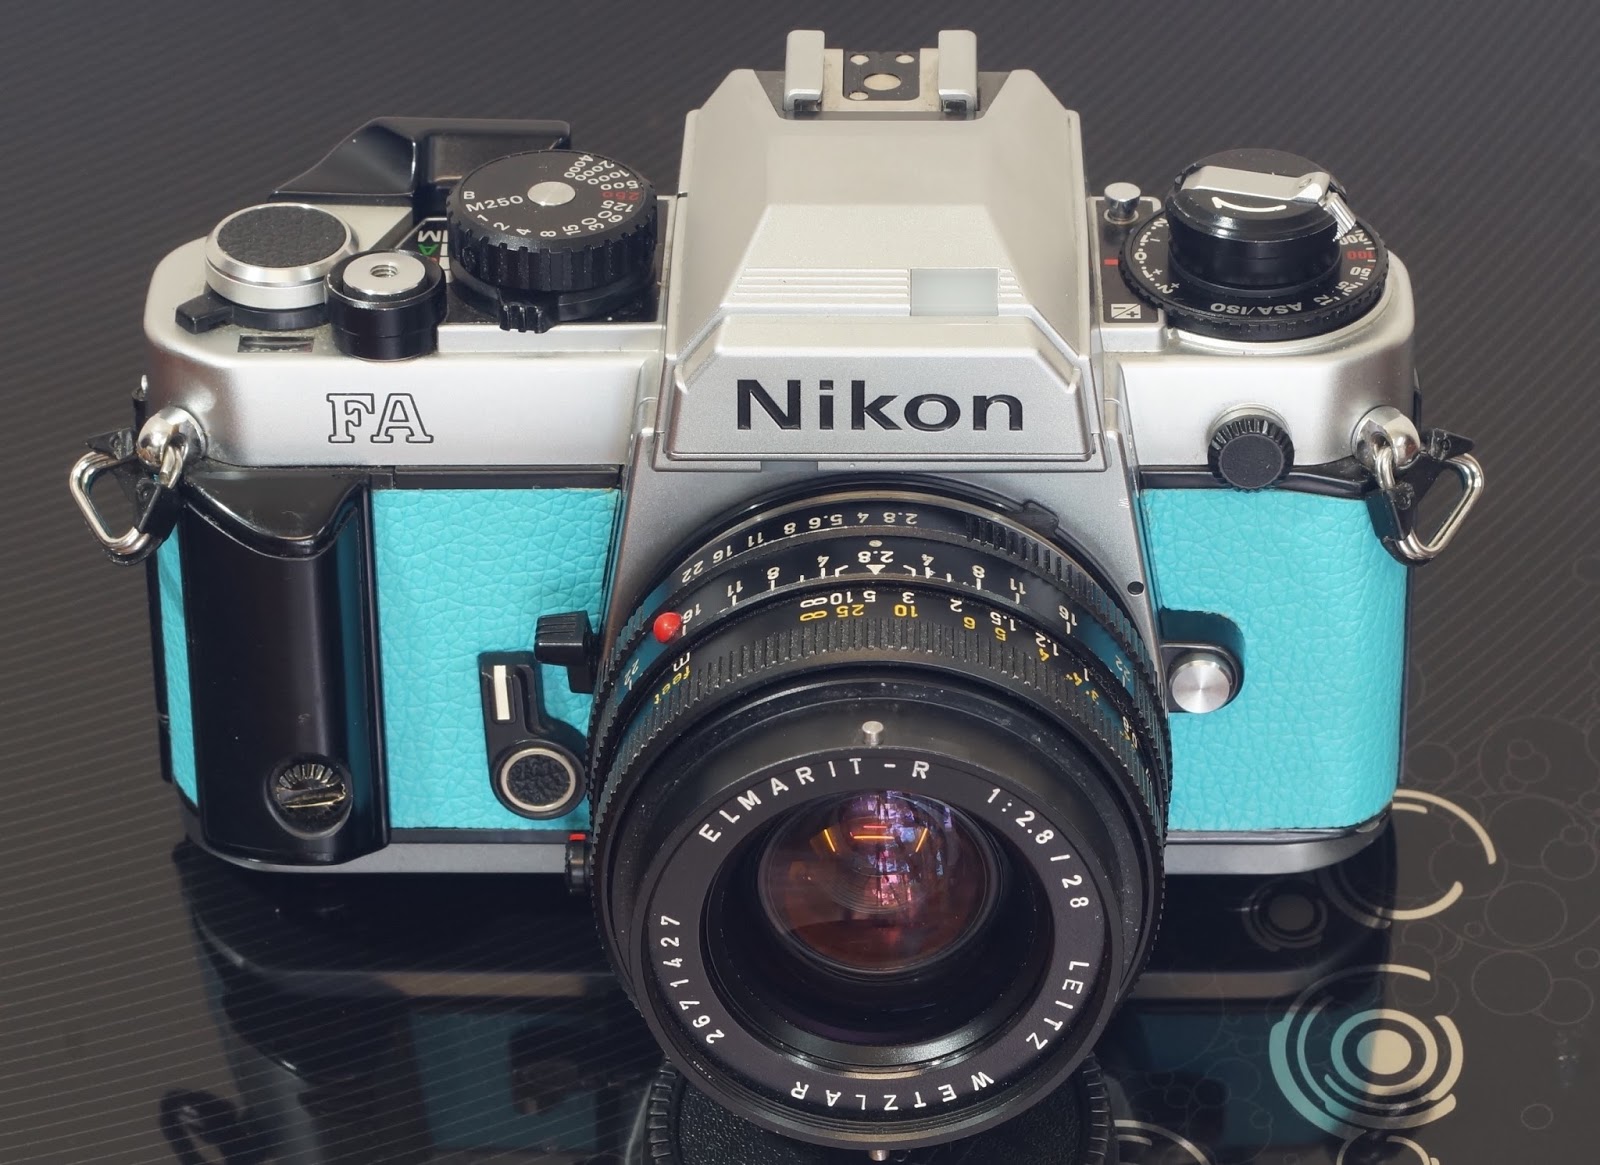
With the plastic block in place this is how a F mount Leitz Elmarit-R 1:2.8 / 28mm works in S & P mode. The AMP metering is clearly now working in these modes and in A mode. These inserts would work well when using other manufacturers lenses that do couple to the Nikon F aperture lever like the SP Tamron Adaptall2 lenses, or older non AI Nikkor lenses. 

In S Mode instead of getting a corresponding reading in the viewfinder LED of say F11 matching the position of the lens aperture, what is seen is F2.8 matching only the plastic block setting on the Meter Coupling Lever no matter what you set the lens aperture ring at. This is because the lens aperture ring is not coupled with the Meter Coupling Ring (with the Leica lens - Tamron Adaptall2 would couple). But that doesn't matter as long as the Meter Coupling Lever is now matching the lens maximum aperture, the camera takes correctly exposed photos once the lens aperture is rotated till F2.8 shows up in the view finder LED instead of a recommended speed - as per the manual. ( read the FA manual for all the vagaries of lens types using the S mode).

In P Mode the camera still works. Now you think I am telling you B-S because you know the Leitz lens is not coupled to the Aperture Coupling Lever in the body. So how can an automatic Program mode function? Well it does as I have tested this using my digital back that fits onto the FA. As all FA owners know, in P mode, when you see "FEE" in the LED it means you need to dial the aperture around to it's smallest setting like F22. But instead with this camera I just take a guess at the aperture setting using "Sunny 16 Rule" and let the camera work it out from there.

My digital back tests show there is a consistent reasonably exposed image obtained within a range of a F Stop either way. So say I see the scene as an F16 shot, I can guess set the aperture at either F11 or F 16 or F 22 and get a reasonably close result in P mode. There is some variance but with my digital back fitted on the FA I can only shoot in infrared (no IR/Anti Aliasing Filter) which means I need to set the Nikon to 800 ASA and the digital back Nex to 200 ASA, this exacerbates any light discrepancy, more so than when the ASA & ISO are matching with the sensor filter installed.

To test the above I took 5 photos of a scene that was best exposed at say 1/250th @ F16 using the Leitz 28mm lens. I set the Nikon to P mode with the lens aperture at F5.6 to F22. So in P mode the camera only knows that I have a 2.8 maximum aperture lens and as far as it is concerned I have not moved the aperture to it's smallest setting of F22 because the body Coupling Ring is still set at F2.8 and it is giving me the "FEE" warning in the LED. What it then does to compute the shot I have no idea but they do come out okay. With a lens that does couple to the aperture lever like an SP Tamron and the correct sized spacer block installed, then the P mode should work just fine. Here are the shots starting at F5.6 in P mode.


The Nikon FA with the digital back installed for testing.


Now that this seems to test okay with the digital back, I will try it out with film and see how the exposures work out.

Sunday 26 March 2017

Bergger Pancro 400 development test.

Pancro 400 Developed in Rodinal & Caffenol C-L

Loading up my latest acquisition of a superb Nikon FA, with this new film Pancro 400, I headed off to the Melbourne F1 Grand Prix. It was a fairly sunny day so ideal for some photography. I used my 50mm Nikkor prime lens and a Nikkor 35-135 plus a T200 x2 extender for the long shots.

It has taken me a good 12 months to get my Caffenol developments working well. Whenever I have tried Rodinal I have always stuffed it up and have actually destroyed some rolls with it. So I have tended to stick with Caffenol to ensure a reasonable result. However I was concerned about using Caffenol with Pancro 400 as I could not find anything on the Net about this. Hence this experiment.

 In the black bag I loaded half the Pancro 400 onto 1 Patterson spool and the other half was left in the canister in the dark and later loaded onto another spool. The first spool I developed in Rodinal at the recommended mix of 1+25 timed for 8 minutes at 20c with agitation for the first minute and inversions at the top of each minute thereafter. Stopped in filtered water and fixed in Ilford Rapid Fix for the long 6 minutes as per the recommendation from Bergger inside the film packaging.

The second half roll was developed in my regular Caffenol C-L for 48 minutes at 22c (see previous post for recipe) and fixed in Rapid Fix for the recommended 6 minutes.

Here is a very interesting comparison where the film was cut in half. It was scanned as one so the scanner software may have favoured the Caffenol side more when it does it's auto adjustment to the film type. (there is no setting for Pancro 400 so I was using Kodak T400 mostly) Click to enlarge.


The Caffenol stand development has clearly brought out all the shadow detail in the clouds giving more depth to the image. I was impressed that my same recipe worked so well with the Pancro 400ASA film as I was expecting to have to modify it. Below are a mixture of shots from the roll in the two developers.

Rodinal


Caffenol C-L


Rodinal


Caffenol C-L
Rodinal


Caffenol C-L


I am actually really pleased that I have managed to not stuff up developing in Rodinal and the results are very pleasing. It was also a quicker workflow. However I like how the Caffenol brings out all the shadow areas. Both processes seem to have worked very well with the Pancro 400 but looking over all the photos on my large iMac screen I tend to lean towards the Caffenol C-L for the best results. I might start using a paper filter when pouring the mixture into the tank. There are no white spots with the Rodinal but I can see a few with the Caffenol and the filter might stop this.

The Bergger Pancro 400 seems to be a nice 400 ASA film and the results are an improvement on my Ilford HP5 photos. But it is hard to go past the Agfa APX 100 or the Neopan 100 for the least amount of grain. At least now I am comfortable that I can safely develop the Pancro 400 in either method without a disaster as the film is too expensive to risk any failures.

Saturday 25 March 2017

My Best Caffenol C-L Recipe - so far!

Switch to Potassium Bromide

The iodised salt was worrying me when I read that the iodine is not so good for film development. So I went hunting for Potassium Bromide and finally located it from a Compounding Chemist. Unfortunately it is only in bulk amounts of 500 gram and as I only use 0.35 gram to my 350ml mixture, it should last me close on 150 years.

This is now my go to Caffenol recipe that is proving consistent on most types of B&W film.

Soak in 400ml of water for 5 minutes.

Per 350 ml of filtered water which covers 1 spool in a 2 spool Paterson Tank.

  • 5.6 grams of Washing Soda.
  • 3.5 grams of Vitamin C.
  • 0.35 gram of Potassium Bromide
  • 14.0 grams of Aldi Instant Coffee.
  • Thoroughly mix and let stand for about 10 minutes
Times - 60 min @20c, 54 min @21c, 48 min @22c, 42 min @23c, 36 min @ 24c, 30 min @25c.

Agitation - First minute gentle swirls and 4 inversions then gentle inversion at 2, 4 & 8 minutes then let stand to finished.

Rinse Stop - Tip out developer, fill with water, tip out again, refill and gentle swirls for 1 minute. Tip out and repeat for another minute.

Ilford Rapid Fix - 70ml + 280ml water = 350ml mix. Fresh mix allow 2 minutes with most B&W film with one inversion at 1 minute. If doing multiple films over the 7 day mixture life I add 15 seconds for each film. But check the instructions for testing fixer. Using Bergger Pancro 400 I follow their instructions of 6 minutes fixing time (and I invert at 2 minute intervals).

Rinse Stop - Tip Fixer back into storage container and fill with water and tip out. Refill and start standard Ilford wash instructions. Swirl 5 times tip and refill, swirl 10 times tip and refill, swirl 20 times and done.

Final Rinse - I use a few drops of Adaflo to 400ml of water and swirl it for a few minutes.

Drying - I shake off as much water as I can feel coming off the reel whilst the film is still on it Then I hang the film horizontally on my push bike rim that has multiple hooks and is hanging from the ceiling through the centre. This has proved the best drying method for me and it stops those long water runs down the middle of the film that you get with vertical hanging.

Film Types

I have had great success with this recipe so far on the following films shot at box speed.
  • Agfa APX 100 ASA - Nice results.
  • Rollie RPX 100 ASA - Seems exactly the same as the Agfa negs.
  • Fuji Neopan 100 ASA - Really beautiful clear negatives that scanned a treat.
  • Ilford HP5 400 ASA - Best results with this film so far.
Bergger Pancro 400
Today I am conducting a trial with this new film and have just finished developing half the roll in Rodinal 1 + 25 @ 8 min as recommended. The other half in Caffenol C-L as per above 48 min @ 22c. The negs look awesome and as they are drying on my bike wheel I cannot tell them apart. Should be really interesting to scan them side by side. Check my next post for the results.


Example Results - click to enlarge.

Nikon FE - Ilford HP5 400 - Caffenol C-L

Nikon FE2 - Rollie RPX 100 - Caffenol C-L

Nikon FE2 - Agfa APX 100 - Caffenol C-L

Nikon FE2 - Fujifilm Neopan 100 Acros - Caffenol C-L

Sunday 8 January 2017

Trying Reduced Salt

My film photography has been put on the back burner for a while as I came up with a project to fit a Sony Nex onto a Nikon FE as an "electric film" conversion. This has been very successful and a whole lot of fun adding new dimensions to my photography. See XOverCameras for details.

I returned from a holiday in the Grampians with two rolls of film to develop and decided to increase the iodised salt (bromide equivalent) to see if I could improve on my previous negs. But this really stuffed them up. The iodine content of McKenzies Iodised Salt is quite variable, so it must be stronger than what is recommended as the equivalent to Bromide, which is x10 times. My negs were really dark and over developed.

So I read up on the processing techniques for Agfa APX 100 and found a recipe where the Bromide was reduced and the time was reduced due to the increased temperature. The results were very pleasing and so I repeated the same recipe with the Ilford Pan 100. As the processing time is quicker than my previous 60mins @ 20c I will stick with this new recipe and try a few other rolls of film. Am wondering if it will be okay with the 400ASA films.

Camera :   Nikon FE2
Film:   Ilford Pan 100 and Agfa APX 100
ASA EI: 100
Developer: Caffenol C-L 20min @ 25c (reduced salt to 1.8g/350ml)
Agitation: Constant inversion for 1st minute then 1 inversion at 2, 4 and 8 minutes.
Scanner: Plustek 7400

Here are some of the resulting photos. Click to enlarge.